Search This Blog

Friday, 24 June 2011

Tips for Makeup Artists - How to Save Time on Makeup Application

Here are some time saving tips for other makeup artists - some tips I've learned from working with other makeup artists and some that I've adapted by learning my own rhythm!

HOW TO SAVE TIME ON MAKEUP APPLICATION - As you already know, time is the biggest factor working against makeup artists!  When I was chatting with one of the former contestants from Canada's Next Top Model, I asked her what was the slowest and fastest time she has gotten her makeup done by various makeup artists.  She said the slowest was 1 hour by a professional makeup artist and the fastest was 10min!  The average was about 30-40min.  Here are some ways to cut down time (great for runway makeup when you're doing like 18 models in 4 hours *sigh!*):

1)  Apply mascara on the lower lashes before applying it on the upper lashes!  After you apply your primer and eyeshadow, apply mascara on the lower lashes first.  If you do it the other way around, you waste time waiting for the upper lashes to dry (because the wet mascara on the upper lashes will hit your eyeshadow makeup and ruin everything)!


2)  Then, use whatever mascara is left on your disposable mascara wand and use your angle eyeliner brush to draw the eyeliner!  This was learned from my second teacher who have done hundreds of faces.  You can even use the liner brush to color the roots of the lashes (especially on the top of the upper lashes) where the mascara can't get to close enough - this is great for blond/light colored lashes.  This saves time from getting your pencil or scooping out gel liner product as well as the time used to sharpen and sanitize your pencil between models.


3)  Use a cream blush (only if you haven't powdered the face) and use the same cream blush as the lip color!   Scoop some product out and apply some of the cream blush on the cheeks, then use the rest and pat it onto the lips.  Not only does this follow the rule of keeping your blush and lipstick around the same tone/color, but the cream blush actually has pretty good staying power.  This was observed by working with another makeup artist - Christina Muran!  Super awesome MUA.

Alternatively, you can use lipstick as the blush by swiping a few streaks across the cheeks and blending it in and then also use the lipstick for the lips.  This was learned from the University of Makeup. 


4)  Apply glue to both false lashes in one hand with dark eyelash glue.  This definitely takes practice, but you basically measure the lashes to the person's eye, trim them to fit, then put one lash between your index finger and thumb, and put the other lash between your middle finger and ring finger - apply the glue and you should be able to put them on simultaneously instead of wasting time doing one lash, waiting for the glue to get tacky, apply, then the other lash, and waiting for the glue to get tacky and apply again.  All you have to do is BAM BAM put both lashes on since the glue tackiness will be tacky at the same time!

5)  Wear a digital watch!  It's so simple, it sounds stupid.  However, it saves time from digging to find your cellphone and checking out what time it is - when you can just flick your wrist and see how much time is left.  It also looks more professional than looking at your phone because people passing by might not think you're checking the time (e.g. checking text messages, missed calls, etc).

These tips don't have to be used all in one sitting.  They're just suggestions!  I only use some of these techniques with runway models...not so much with paying clients like brides and bridesmaids as some of these techniques may seem non-traditional (e.g. lipstick on the face!).  With just these simple tips, you can shave off minutes from the makeup application.  I hope you found this useful!

Wednesday, 22 June 2011

More Behind the Scenes...

Yay!  Our shoot was published in the Bridal Fantasy blog (http://networkedblogs.com/jxfl9?ref=nfhttp://networkedblogs.com/jxfl9?ref=nf) (refer to June 7th's Behind the Scenes...blog).  The blog is called Wonderfully Lost in Wonderland and it features local vendors in the wedding industry!  The theme for this one was Alice in Wonderland and it was the second shoot out of 7 or 8 that day.

Photo by Justine Milton of Milton Photography!  The brain of this whole project!

For Alice's makeup, the photographer requested some crazy feather lashes.  I stuck on some blue polka dot feather eyelashes on Ashley while keeping the eyeshadow a light white and pink using MAC pigments...I kept it light because the lashes are super over powering anyway. 
I also stuck light blue crystal gems and white pearl gems on the side of her temples and over her eyebrows (can't see them in the pic).  I also gave her a neutral lip...but last minute I decided to stick some magenta glitter on top because we had time in between shoots.  I just mixed the glitter (Makeup Forever) with some MAC Clear lip gloss and patted on top of the lips.
 I also got to play with crazy eyelashes on the male model as well!  Bwahaha, I got to be the first to put fake eyelashes on his face and put purple lipstick on him!  The lashes were from a Halloween stash that I had and it had both top (can't see top lashes here) and bottom lashes that had tints of gold, red, and purple.  Whoops, I guess the lipstick sunk in and made the cut on his bottom lip more prominent.  Note to self...use lip primer *sigh*.  He had to remind me to take the makeup off because he didn't want to go out in public like that...(why not?!).  Good thing I had makeup remover with me...

Hahaha, I was giggling inside when they had to do this shot...so awkward?  They better not ruin their lipstick!!!  The Fuss Cupcakes were so good!  To check out more vendors, check out the Bridal Fantasy Blog!   Update:  June 24th - Oh, there is a Part 2 to their blog:  http://www.bridalfantasy.com/blog/post/358-Wonderfully-Lost-in-Wonderland-Part-2

Speaking about blogs...I was contacted by a couple of local fashion bloggers, Rowena and Stacey of A Pleasury of A-Lines of B-Lines (http://apleasuryof.blogspot.com/).  They were doing a segment on Becca Taylor, a local designer that focuses on sustainable clothing using eco-friendly dyes and fabrics.    

 Photos by Dannielle Oswell from DJ Photography!

Stylist Garett Paquette from Grateful Head did the hair.  The girls emailed me a couple of pictures of what they wanted for the models and they were all different.  For the first beautiful model, who works for Hollaback Alberta which focuses on street harassment stories (http://alberta.ihollaback.org/), I focused on more golds/peachy/bronze colors and a nudish brown lip.  Worked pretty great with the earthy wardrobe!

 
 Wow, these pictures are a lot better than what I took on my iPhone...lol.

The second model, I got to work with a beautiful aboriginal girl, who was sisters with the designer!  Check out the quality of photos between Dannielle's professional photos...and my crappy iPhone photo!  The model is still gorgeous regardless of which camera captured her.  I gave her rusty cinnamon shadows and a neutral berry lip color.  It looked great on her skin tone and worked great with wardrobe.
The last model had super sensitive eyes, but we got through it. She had beautiful green/hazel eyes so we played up a lot of soft neutral pinks.  Her eyes were Asian-like so I couldn't do a color in the crease...because there is no crease!  I did the gradient pinks and dark browns from inner to outer, from light to dark...check out my crappy iPhone pic to see what I mean!  I never go past 1/3 of the outer eye for dark shadows or it starts to close up the eye.

I used very natural looking criss-cross lashes on all the models, with various thickness and length depending on the model's eye shape and size.  DJ Photography is editing some more pics - can't wait to see them!

Tuesday, 7 June 2011

Behind the Scenes...

This past weekend was b to the z (busy) haha!

I had a huge project with Milton Photography on Sunday for a 7 wedding theme shoot outside in the park... I was there from 11:45am to 9:30pm.... The theme?  Disney characters!!!  Justine Milton coordinated fantastic wedding decorators, decorations, models, stylists, dresses, flowers and CAKES!  Uh, being the nerd that I am, I only took behind the scenes shots of flowers and cakes...lol...no makeup/models.  That was the photographers job!  I'm waiting on some of her amazing work!  Here are some of what Edmonton vendors have to offer:

These flowers in a teapot and sugar bowl was for the Alice in Wonderland and Mad Hatter shoot!  These were so amazingly creative - I think they were by Flowers off Whyte.  The Mad Hatter model was so funny...he told me that he and his friend went to Thailand, lived like kings for $100/day in penthouse hotels...got really drunk one night and he ended up with a tattoo on his ribs and a piercing in his neck?!  Hangover 2 much?  lol.

These cupcakes were also for the Alice and Wonderland and Mad Hatter shoot...these were from Fuss Cupcakes!  I destroyed the one with the rose (made of fondant) on top...the cupcake was so good...It was also my breakfast, lunch, and dinner for the day...coupled with a handful of chips and half a can of spilt Nestea...ahhh yes, the diet of an onsite makeup artist!  If you're an MUA, granola bars and Redbulls should always be carried in your kit or purse!


 These were wonderful bouquets for Beauty and the Beast and Snow White!  Notice the apples in Snow White's bouquet?  How clever playing off the poison apple in Snow White!  So beautiful!


This is Belle's cake!  Yum!


 I think this was Sleeping Beauty's cake?  Looks so good!  The flowers are all sugar and hand crafted!


 I think this was Sleeping Beauty's bouquet...This was AMAZING...when you held it up, there was like a waterfall of flowers that hung and flowed downwards...It had little gems and it was crazy heavy.  This flower arranger really went all out on this one!

Here is Jasmin and Alladin's cake!  This would be perfect for a children's party :)


This cake was my FAVORITE!  This was for Ariel's (The Little Mermaid) shoot and the baker (Second Slices) apparently helps out the head bakers on a show called Ultimate Cake Off...and wow, is she ever talented! She hand crafted the little seahorse bride and groom, all the seashells...the coral is made out of hardened sugar...The detail was so amazing.  For the final touch, she placed a vase of water in the middle and it had little fishies in it! 

Here is a snap of our setup area!  The one decorator, Brianna from Cherish Planning, set this up all by herself in the beginning...poor girl!  The area was literally just off the park path in the bushes...The mosquitos in this area were mutant sized.  They started coming out just as the sun was setting...
The decorators setting up the magically scene for Ariel.  I wish my wedding tables could look this good...

We weathered through 2 mini wind/rain storms, one ranger telling the photographer to move the truck off the bike path, one crazy lady that accused us of being drug dealers (lol...), 2 models pulling no-shows (and that's why they'll probably never get booked again).  Hopefully I'll be able to do a follow up blog regarding the makeup for the models once Justine is done!

Friday, 27 May 2011

Best Drugstore Makeup

If you have seen my makeup collection - both personal and professional - you will know that I have a huge range of makeup brands from drugstore, to high end, to international (e.g. Korean and Japanese) brands.  I am always looking for the best and I wanted to recommend some amazing drugstore products that I have come accross!  Because I deal with the wedding industry a lot, this is more geared towards makeup with good coverage, is cry-proof, and good longevity.


Best drugstore foundation:
Revlon Colorstay Foundation - they have formulas for both dry-normal skin and oily skin.  It gives a nice matte finish - perfect for pictures!  Although it says it has SPF in it, the amount of titanium oxide in the formulas will not create enough flash bounce back (creating that whitish aura on your skin) enough in photos.
About $20


Best drugstore concealer:
Maybelline Coverstick - it's so easy to use and the coverage is amazing on scars and pimples.  It's too thick for undereye circles - you need to sheer it down with some moisturizer before applying.  You can also apply this over the eyelids as a shadow primer.  Although not as effective as Urban Decay Primer Potion, it'll still work through long enough to take your photos.  This doesn't have any SPF in it so there is no white bounce backs!
About $7-8


Best drugstore powder:
Okay - I had a hard time finding a powder that I liked.  A lot of them made my skin break out (especially covergirl).  The one that I would recommend is the NYC Smooth Skin Loose Powder.  Great for maintaining a matte finish throughout the day.  It comes with a powder puff too so you don't have to spend extra money buying a puff or brush to use it.
About $5-7


Best drugstore eyeliner (pencil):
Styli-style Line & Seal 24hr - This pencil goes on and just doesn't want to come off.  It has amazing staying power.  Once you put it on, you probably have about 10seconds to smudge it, and then it sets and it will not budge after that.  I could only get this pencil at Rexall Drugstores.  It won't come off easily with just soap and water, you'll need waterproof makeup remover (or olive oil/baby oil).  I've also heard good things about the Prestige liners.
About $7


Best drugstore eyeliner (liquid):  
Loreal Telescopic Liquid Eyeliner - This is an amazing liquid liner with a felt tip for easy application.  The felt tip brush is dippable into the formula (unlike pens that dry out too quickly) so you are able to use up the product efficiently.  This product DOES NOT SMUDGE.  This is a product that is best used personally since the brush is dipped back into product (no contaminating the product for clients please!).  To take off, you actually have to rub it off with warm water.  Very similar formula to the MAC Superslick ($17.50) and the KissMe liquid liners ($30).
About $10


Best drugstore eyeshadows:
NYX eyeshadows - hands down you get your bang for your buck.  Great pigmentation and CHEAP.  I always recommend getting a matte black, a frosty white, and a vanilla/skin color shadow.  Every other color is just an accent color.!.
About $3-8 depending if you want single shadows or palettes


Best drugstore mascara:
Covergirl Lashblast (Waterproof) and Maybelline Falsies (Waterproof) - The CG Lashblast hardly smudges and gives a natural coat to your lashes.  It's really hard to clump the formula on your lashes.  The Maybelline Falsies is awesome of you want volume and a tiny bit of length to the lashes...mine are non existent so I like the Falsies better.  It smudges a little but it's hardly noticeable.  I have oily skin so if it smudges only a little, it would be awesome for normal to dry skin people.) -


Best drugstore blush:
I haven't really found much difference with drugstore blushes and high end brand blushes.  If you find a cheap blush, just go for it.  Best bang for your buck is the NYX blush.  Mauve is a pretty color.
About $4-5
Best drugstore bronzer:
Rimmel Natural Bronzer - Nice matte bronzer - I don't like shimmery bronzers because it can sometimes flash weird.  With matte bronzers, you can also use it to contour the hollows of your cheek or any areas you want to create shadows and make skinner.  
About $7
Best drugstore lipstick:
Covergirl Outlast All Day Lipcolor - I am not a fan of Covergirl, but man, this product works!  It literally stays on your lips all day except for when I was eating a pound of greasy chicken wings.  It applies with a doefoot applicator, then wait about 60 seconds for it to bind to your lips, then apply a semi-shiny top coat on top.  I choose this one out of the other long wear lipsticks/lipcolors because it comes with that semi-shiny top coat that you can bring with you and apply if you want a little shine throughout the day.
About $8-10


Best drugstore lipgloss
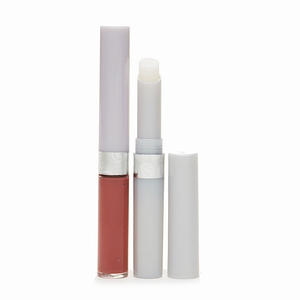
Covergirl Wetslicks - I really enjoyed this lipgloss and is the only drugstore lipgloss that I finished.  It has a nice non-sticky shine to it and it feels like it's hugging the lips.  I actually like it more than my high end lip glosses (e.g. MAC and YSL golden gloss - that has 24karat gold in it!)
About $10


Best drugstore fake eyelashes and lash glue:
- Ardell fake lashes and Duo lash glues are the best to get.  Ardell lashes have a thin band so it curves to the eye a lot better without lifting at the ends compared to other lashes.  The Duo glues come in clear and dark-tone.  If you're an expert in applying lashes, use the dark-tone.  If you're just starting out on putting lashes on, start with the clear tone.  Reason being that if you get the dark-tone glue on your eyelids with your eyeshadow already on, it's going to dry a dark mark on your lids and is hard to come off without wrecking your work.  If you're allergic to latex, do not buy Duo.  Ardell and Duo can be bought at Rexall Drugs.

These drugstore products will give you the most bang for your buck.  In my opinion, some of these products are better than high end brand products! Good luck!!

Tuesday, 17 May 2011

How to Unclog an Airbrush Gun

I had debated on getting an airbrush machine for the longest time and when I finally bought one, it was CLOGGED!  I bought it from a retired MUA and she didn't like the hassle of cleaning it so she used it one and a half times and then it just sat there.

Anyway, when I had the chance - hooked it up to the compressor and dropping in about 6 drops of foundation into the gravity feed cup.  I pressed down on the button and pulled back, and no foundation came out, only air.  I was sooooo sad at this point...it's like bringing back a new toy and wanting to play with it but it's broken...

1)  I cleaned out the cup using alcohol and a q-tip.  The alcohol ran through the front so I don't think there was blockage there.  However, when I hooked it back up to the compressor, it still only blew out air, no product.

 
2)  I cleaned it out again using alcohol again but with a tiny pipe cleaner brush that the retired MUA had included in the kit.  She said you can only get these in the UK.  They fit further into the passage way and they're lint free so no threads get stuck up in there.  Unfortunately, it was still all air and no product.


3)  I took it apart and soaked all the parts in 99% Isopropyl alcohol according to the Temptu DVD.  I soaked it for 15 min, tried it again, but still just air and no product.  So I soaked it for the night, tried it in the morning...still no product spraying out!  Rawr!


I was so disappointed at this point.  I started researching which parts I needed to replace and what new airbrush guns that I could purchase here in Edmonton instead of online.  I wanted to play with the airbrush system immediately so I was going to head down to an art store or a hobby/toy store to pick something up. 

I also researched how to clean an airbrush machine and came across this girl's youtube video.  She was showing how she cleaned her Iwata airbrush gun at her salon.  She was moving the needle back and forth while having her airbrush gun on.  Mind you hers wasn't clogged, but I thought it would be a good idea to try it.


I screwed everything back on except for the back part (the shell that covers the needle) and I untightened the nut that holds the needle in place (so that it's movable).  I filled the gravity feed cup with alcohol and started spraying.  

Of course only air came out at that point, so I started moving the needle back and forth while still spraying, and it spurted for a mili-second and alcohol started spraying out!!  So happy!  I filled it again with water (twice) just to make sure and..yup, everything in the gravity feed cup drained dry and had been misted all out.  Sucess!  I guess the needle created enough pressure and disturbance, in conjunction with the alcohol, loosened whatever was clogging it.  


I hope this helps other "doh! my airbrush is clogged" users!